Partial Views and Child Actions are one the most used features of ASP.NET MVC. Partial Views provides us a way to create a reusable component that can be used in multiple Views. There are Actions which can be marked as Child Actions and these cannot be invoked via URL but inside views or partial views. Child Actions are no more available with ASP.NET Core. View Components are new way to implement this feature in ASP.NET Core.
Few Challenges with Partial Views
Partial Views has certain challenges and limitations. Say if we use child action in a view then while execution, an additional life cycle takes place, first ASP.Net MVC life-cycle executes for the loading the main View and once it gets loaded, another for the Child Action. Also, putting certain filter like Authorize over Child Action, used in layout, makes the complete page fail if authorization fails. It also does not support the awesomeness of async programming, test-ability, Separation of Concerns etc.
What is View Component?
View Component is one of the many awesome features introduced in ASP.NET Core. As mentioned earlier, View Components are similar to Partial View and enables us to write reusable component which can be used in multiple views. View Components are robust, leverages asynchrony, Dependency Injection friendly, follows separation of concerns which makes it easily maintainable and testable.
How to Create a View Component
There are few ways to create a View Component. These are
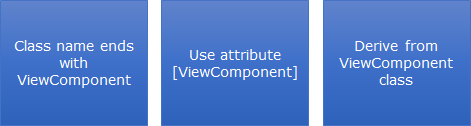
Class name ends with ViewComponent
We can write a plain C# class and name it with suffix ViewComponent as
public class TopBooksViewComponent
{
    public void InvokeAsync()
    {
        // View Component Logic
    }
}
ASP.NET Core recognizes the suffix and render it as view component. As this is a plain C# class, we would not have the basic MVC feature available like MVC Context etc.
Using ViewComponent attribute
It provides another way to create a View Component. We just need to put this attribute on any class as
[ViewComponent]
public class TopBooks
{
    public void InvokeAsync()
    {
        // View Component Logic
    }
}
This is almost similar as previous one. Here again we won’t have the liberty of MVC features until it is inheriting another entity. There is one more usage of this attribute, to provide a custom name to the View Component as
[ViewComponent(Name = "Featured Books")]
public class TopBooksViewComponent
    {
    public void InvokeAsync()
    {
        // View Component Logic
    }
}
Derive from ViewComponent Class
It is a simplest way to create powerful View Component via leveraging standard MVC features like HttpContext, TempData, ModelState etc. Also it allows us to use View similar to normal mvc controller. Here we don’t need any suffix in the class name (which was required in earlier ASP.NET Core versions). It looks as
public class TopBooks : ViewComponent
{
    public async Task<IViewComponentResult> InvokeAsync()
    {
        // View Component Logic

        return View();
    }
}
We will use the third option in our example. So let’s start
Note – For this example, I am using Visual Studio 2015 update 3 and ASP.NET Core 1.1.1. Complete code can be downloaded from here.
Here we will be creating a View Component which shows Top n (based on the parameter) books. For this, we will be reading the data from a book repository where we have hard coded data but in real applications, it could be read from Database, web service etc. Let’s have a look on this
public class Book
{
    public int Id { get; set; }

    public string Title { get; set; }

    public string Image { get; set; }

    public string Author { get; set; }

    public float Rating { get; set; }

}
// Repository
public interface IBookRepository
{
    Task<IList<Book>> GetTopBooksAsync(int noofBooks);
}

public class BookRepository : IBookRepository
{
    static IList<Book> allBooks;

    public BookRepository()
    {
        allBooks = new List<Book>()
        {
            new Book() { Id=1001, Title="Lifehacker: The Guide to Working Smarter, Faster, and Better", Image="LTGWSFB.jpg", Author="Adam Pash; Gina Trapani", Rating=4.4F },
            new Book() { Id=1002, Title="Mindhacker: 60 Tips, Tricks, and Games to Take Your Mind to the Next Level", Image="M6TTGTYMNL.jpg", Author="Ron Hale-Evans; Marty Hale-Evans", Rating=4.6F },
            new Book() { Id=1003, Title="Information Technology for Management: Improving Strategic and Operational Performance", Image="ITMISOP.jpg", Author="Efraim Turban; Linda Volonino", Rating=5F },
            new Book() { Id=1004, Title="Visualize This: The FlowingData Guide to Design, Visualization, and Statistics", Image="VTTFDGDVS.jpg", Author="Nathan Yau", Rating=4.6F },
            new Book() { Id=1005, Title="Creating Personal Presence", Image="CPP.jpg", Author="Dianna Booher", Rating=4.4F }
        };
    }
    public Task<IList<Book>> GetTopBooksAsync(int noofBooks)
    {
        return Task.Run(() =>
            {
                IList<Book> orderedBooks = allBooks.OrderByDescending(b => b.Rating).ToList().Take(noofBooks).ToList();
                return orderedBooks;
            });
    }
}
We have created a book class with basic properties. Then we created an interface for repository and implemented the same in BookRepository which implements the GetTopBooks method. As mentioned earlier the data is hard-coded here. So we have created our Repository, we need to add it in our application. ASP.Net Core is DI (Dependency Injection) friendly and provides a basic DI container. To add this repository, we need to write the below code in ConfiguerServices method at startup.cs
services.AddTransient<IBookRepository, BookRepository>();
It injects a new instance of service every time it is used in the application. There are few other options based on the scope and life time of instance. To learn more about dependency injection ASP.NET MVC core refer my previous post.
Till now we have written code for supplying data to our component. Now it’s time to write the View Component.
Step 1:
First, we will create a Class which derives from ViewComponent. I have created a class name TopBooks and here we need to implement InvokeAsync method which can take multiple parameters based on the need which is passed while invoking the view component. My View Component class looks like
public class TopBooks : ViewComponent
{
    IBookRepository bookRepostiroty;
    public TopBooks(IBookRepository repository)
    {
        this.bookRepostiroty = repository;
    }
    public async Task<IViewComponentResult> InvokeAsync(int noOfBooks)
    {
        var items = await bookRepostiroty.GetTopBooksAsync(noOfBooks);

        items.ToList().ForEach(b => b.Image = @"/images/" + b.Image);

        return View(items);
    }
}
In the InvokeAsync method, we are passing a parameter noOfBooks and based on that we are fetching the books from bookRepository. The items return by the repository contains the book image name which is getting converted in the complete URL so that it can be directly used on UI. Then we are passing these items in the view. We didn’t provide a view name, it finds a view with name Default.cshtml but we can also provide any other name as well. For that we need to pass the view name in string format, similar to normal controller returning named view. We can see that here the return type of this method is IViewComponentResult which is specific for View Component.
This class looks like mini controller as it returns the view. It has only one method InvokeAsync which can be called from the specific View Component, not from the browser. It also provides another method InvokeAsync which can be used instead for async handling.
We used here our BookRepository that we created and it got injected via constructor. Now we will move to step 2.
Step 2:
We need to create the UI for View Component. It is normal razor view and we will create a new view with name as Default.cshtml. We cannot put this view anywhere but one of the following locations
- ~/Views/Shared/Components/[ViewComponentName]/Default.cshtml
- ~/Views/[ControllerName]/Components/[ViewComponentName]/Default.cshtml
If we want to use the View Component across multiple controllers, then first location should be used. On the other hand, if we want to restrict its usage to the same controller then second option should be chosen.
Also as we choose the name of the view component as default.cshtml but we can use any other name. When we have any other name like Foo.cshtml then we need to pass the name of View from our mini controller as
return View("Foo", items);
It is similar like Views in the normal controller where if the action name and view name is same then we do not need to pass the view name else need to provide.
Let’s see our View (Default.cshtml)
@model IEnumerable<ViewComponentBlog.Models.Book>
<table class="table table-condensed table-hover">
<tr>
<th> </th>
<th> Title</th>
<th> Author</th>
<th> Rating</th>
    </tr>
    @foreach (var b in Model)
    {
<tr>
<td> <img src=@b.Image /></td>
<td> @b.Title</td>
<td> @b.Author </td>
<td> @b.Rating</td>
        </tr>
    }
</table>
It is like normal view where we have the list of books as in the model and we iterated that to display on the screen.
Step 3:
Now the final step is to use the View Component in any view. It is very simple, we can invoke it at any place.
@await Component.InvokeAsync("TopBooks", 3)
Here the first parameter is the name of the view component and then the parameters that we used while implementation of InvokeAsync method. We used only one parameter number of books so here we are passing the same. Other important thing as we are using asynchronous method, we need to use await keyword as in the example else it won’t be rendered on the screen.
Now we are done and now let’s run the application

So we can see that our view component is displayed as expected.
View Component can also be used in MVC Controller as well. For that we need to use ViewComponetResult class as
public IActionResult IndexVC()
{
    return ViewComponent("TopBooks", 3);
}
How to use ViewComponent as TagHelper
View Component also can be used tag helpers in ASP.NET Core 1.1. Tag Helpers are also a new feature introduced with ASP.NET Core which provides us to render a server side code in the razor mark up in a HTML friendly way and allows us to write robust, reliable and maintainable. I wrote a post on it long back on it, you can have a look here. As newer version of ASP.NET Core got released, there may be slight changes in it. To use it as TagHelper we need to first include TagHelper library in project.json (Microsoft.AspNetCore.Mvc.TagHelpers) then add it in the Views as
@addTagHelper *, Microsoft.AspNetCore.Mvc.TagHelpers
@addTagHelper *, ViewComponentBlog
Here ViewComponentBlog is the project name. Now it can be used on the view as
<vc:top-books no-of-books="2" >
</vc:top-books>
It looks simpler and cleaner. To use any View Component, the tag should start with vc and the view component and parameter name are converted on lower kebab case (means all in lower case and if there is case change then a hyphen is inserted like TopBooks changed to top-books), it would not work if the naming is not properly used. So now you have the beauty of TagHelper with ViewCompoenent.
Conclusion
In this post, we have seen that View Component is powerful feature of ASP.NET Core which can be used to write complex reusable controls for the application. It is loaded with separation of concern, async and testability features and similar to normal controller and view. We created a sample view component in step by step approach and used that in a view and used the power of DI for injecting Repository in our control. Also, we saw that in ASP.NET Core 1.1, it can be written as TagHelper which makes sure, we are not forced tow write C# code in the view J. Complete code is attached with the post.

please can you share tutorial or changes about using view components in asp.net core 2.0 ..thanks
I don’t think any major changes announced in asp.net core preview 1. Preview 2 is yet to be out and there could be some minor changes. Did you see any differences in preview 1? Also, you can refer release notes for preview 1 belowhttps://blogs.msdn.microsoft.com/webdev/2017/05/10/aspnet-2-preview-1/