Dependency Injection (DI) is one of the hottest terms being used in software development nowadays. Most of the application developers talking about this and try using it in their applications. One of the key reasons Agile methodology, as it is used in almost every project in one or other way and DI easily fits into this model and help in achieving its goal. I have been getting many request to write about DI in AngularJS so let’s start exploring that.
Note – This post is a part of series of posts on AngularJS and it is 16th one. Click here to view all the post. Apart from that you can also use the navigation links for next and previous post in each post at the bottom to check all.
What is Dependency Injection?
DI is software design pattern that implements the Inversion of Control (IoC) to resolve the dependencies. It allows us to write loosely coupled system which enables us write the reusable components and helps to test the code properly without affecting or need of any other component. Injection refers passing the dependent object to the component based on available options. Normally there are three standard ways to inject the dependency.
- Method Injection (Passing the dependency as parameter)
- Property Injection (Setter)
- Constructor Injection
Implementing DI in a Vanilla JavaScript
In this example, I have a folder watcher, which watches a folder and if there is some change happens then it calls the event logger which internally calls a MessageGenerator which returns a message and logs it.
I have a Message Generator which has a method GetMessage that returns a message. It is as
function MessageGeneartor() {
}

MessageGeneartor.prototype.getMessage = function() {
    return 'My new custom message';
};
My logmessage method looks like which has the responsibility to get and log the message
function logMessage() {
    var messageCreator = new MessageGeneartor();
    var message = messageCreator.getMessage();
    alert(message + ' logged at ' + new Date());
}
EventLogger looks like
function EventLogger() {
}

EventLogger.prototype.logEvent = function () {
    logMessage();
};
Here from logEvent method, we are calling the logMessage which does the actual work. Last, my FolderWatcher looks like
function FolderWacther() {
    var myEventLogger = new EventLogger();
    myEventLogger.Logevent();
}

FolderWacther();
Here in FolderWatcher, we are creating the instance of EventLogger and calling. So lets have the complete example
function MessageGenerator() {
}

MessageGenerator.prototype.getMessage = function() {
    return 'My new custom message';
};

function logMessage() {
    var messageCreator = new MessageGenerator();
    var message = messageCreator.getMessage();
    alert(message + ' logged at ' + new Date());
}

function EventLogger() {
}

EventLogger.prototype.logEvent = function () {
    logMessage();
};

function FolderWacther() {
    var myEventLogger = new EventLogger();
    myEventLogger.logEvent();
}

FolderWacther();
Here we are creating the all the dependencies inside the methods. Let’s implement DI and start from the lowest level method logMessage. In this method, instead of creating instance of MessageGenerator, we can pass it as parameter like
function logMessage(messageCreator) {
    var message = messageCreator.GetMessage();
    alert(message + ' logged at ' + new Date());
}
Inside the above method, now we are not creating any resource/dependency inside the method, instead passed as parameter. To accommodate it, MessageGenerator can be passed in EventLogger as
EventLogger.prototype.logEvent = function () {
    logmessage(new MessageGenerator());
};
So in above example, we implemented DI at one level. We can refactor it more. As in above code, we are creating an instance of MessageGeneraor inside logEvent so let’s now change EventLogger as
function EventLogger(logm, creator) {
    this.logger = logm;
    this.messageCreater = creator;
}

EventLogger.prototype.logEvent = function () {
    this.logger(this.messageCreater);
};
So here, we passed a reference of logMessage and instance of MessageGenerator. Consequently, we need to change the FolderWatcher as
function FolderWacther(myEventLogger) {
    myEventLogger.logEvent();
}

FolderWacther(new EventLogger(logMessage, new MessageGenerator()));
Now we have implemented DI in whole hierarchy. Now there is no method or class where we created any instance inside. Let’s see the complete code now.
function MessageGenerator() {
}

MessageGenerator.prototype.getMessage = function() {
    return 'My new custom message';
};

function logMessage(messageCreator) {
    var message = messageCreator.getMessage();
    alert(message + ' logged at ' + new Date());
}

function EventLogger(logm, creator) {
    this.logger = logm;
    this.messageCreater = creator;
}

EventLogger.prototype.logEvent = function () {
    this.logger(this.messageCreater);
};

function FolderWacther(myEventLogger) {
    myEventLogger.logEvent();
}

FolderWacther(new EventLogger(logMessage, new MessageGenerator()));
This must have make some idea of DI. Till now we have seen that how can we write a vanilla JavaScript code using DI. Now let’s jump to AngularJS.
Dependency Injection in AngularJS
As AngularJS is a complete JavaScript framework which provides many out of the box features. And on top of it the whole framework is DI friendly and allows us to inject dependency in different ways. We will discuss it in detail.
There are two key items when we implement dependency injection
1- Creating the instance. It could be created at while application initialization.
2- Passing the instance to the appropriate place where it can be used.
In Angular, $injector is key service which helps in creating the instances and passing to the appropriate places. We have already seen in one of our earlier posts, the services are kind of global singleton objects which can be reused across the application when needed. $injector helps in creating the instances of services and special objects.
1- There are two types of services in Angular. One is inbuilt services like $http, $q etc (which starts from $) and another custom services that we create and register with module.
2- Special objects are like directives, filters, controllers etc.
$injector itself does not create instance but it take the help of other component which creates the instance as $injector needs. And this component is called Provider. Provider is a kind of base mechanism to create the instance but there are four other types which are just a syntactic sugar on top of it.Internally they all use the provider only. Lets see all those
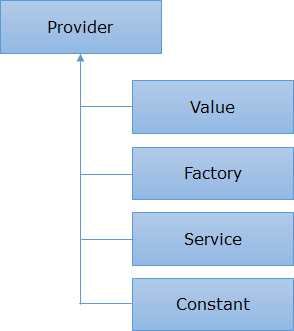 So we can see that Value, Factory, Service, Constant all are made on top of the Provider. We will discuss each in detail.
Value : It is the most simple way to provide a JavaScript object that can be used in the entire angular application. The passed value could be any primitive or non primitive type. It could be number, string, date array or any JavaScript object. As we discussed in many earlier posts, Module works as container in angular app so all the components must be registered with it. So same is true here as well. Lets see an Example
var myangularapp = angular.module('myangularapp', []);

// Providing a number and assigning to Value object
myangularapp.value("NumberofItems", 40);

// Providing a string and assigning to value object
myangularapp.value("ApplicationHeader", "AngularApp with DI using value");

// Providing a current date and assigning to value object
myangularapp.value("Person", { name: 'Tom', Age : 31, City : 'Florida' });

// Providing a current date and assigning to value object
myangularapp.value("Time", new Date());
Here we registered four objects of different type via value with module. Now these can be used in the entire application lets see
// Now these value can be used where we require like controller factor service. These values are initialized while loading

myangularapp.controller("mycontroller", function($scope, NumberofItems, ApplicationHeader, Person, Time) {
    $scope.ApplicationHeader = ApplicationHeader;
    $scope.CurTime = Time;
    $scope.itemCount = NumberofItems;
    $scope.Person = Person;
});
HTML :
<div ng-app="myangularapp" ng-controller="mycontroller">
<h2>{{ApplicationHeader}}</h2>
<h3>Time when created : {{CurTime}}</h3>
<h4>We need to show {{itemCount}} items</h4>
<h4>Name : {{ Person.name}}</h4>
</div>
Here we can see that we have injected all four in controller and later used that in the view. So it is the simplest one.
Factory – Using Factory provider, we create a function which takes 0 to n parameters which can be dependent on others items which can be passed as parameters. Based on those parameters and via some business logic (if required), it creates an object and return it. One of the key points here, It is singleton and reusable component. We can use the object as parameter that we set as value above. Let’s see a example
var myangularapp = angular.module('myangularapp', []);
// Providing a number and assigning to Value object
myangularapp.value("pi", 3.14);

myangularapp.factory('Circle', function(pi) {
    var myfactory = {};
    myfactory.Area = function (r) {
        return pi * r * r;
    }

    myfactory.Circuimference = function (r) {
        return 2* pi * r;
    }
    return myfactory;
});

myangularapp.controller("mycontroller", function ($scope, Circle) {
    $scope.AreaofCircle = Circle.Area(5);
    $scope.CircuimferenceOfCircle = Circle.Circuimference(5);

});
Here we created a service using factory which returns an object which has two methods – Area and Circuimference. Here I have used value of pi as parameter which is set via Value.
So till now we discussed about DI, DI in vanilla JavaScript and DI in AnguarJS including Value and Factory. Other three options we will be discussing in next post. Sample for this post is attached.
Hope you are enjoying the series. Do share your feedback.
Cheers,
Brij
[28th Aug 2015 : Updated this post for Angular version 1.4]

Pingback: How to use Angular Filter in Controller, Factory, Service – Part 15 | Code Wala
Pingback: Dependency Injection Annotation Process in AngularJS – Part 18 | Code Wala
Reblogged this on Dinesh Ram Kali..